If you would like for your instructor to see a photo, image or graphic, it is a good idea to have the image display right in the Blackboard item instead of requiring them to click on a link to download it.
Follow these instructions to add an image to any Blackboard item:
- Log into Blackboard and navigate to where you would like to add the image, such as in a discussion or an assignment.
- In the Message area, click + to add content. If you do not see the + button click the three dots in the top right to display all rows of icons.

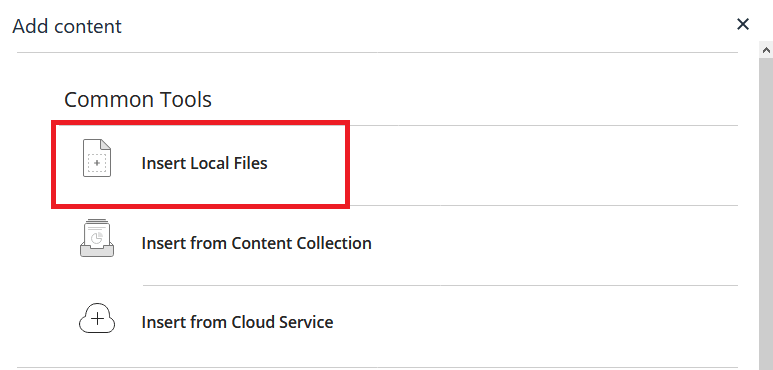
- Under the Add Content tab, click the Insert Local Files button to navigate to the image you would like to add. You can also choose to add the file to Kaltura here if you would like to use it easily in other posts!

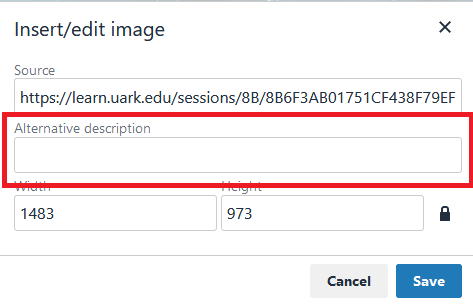
- You can right click on the image and click Image to add an Alternative Description for accessibility.

- Check to see if your image is displaying correctly. You may choose to resize your image by selecting the image and dragging one of the corners larger or smaller.
- When you are happy with the way your item looks, click Submit to save the changes to your Blackboard item.
Please note: If the image or graphic you added is taking a long time to load when you view it, some people may not be able to see it if the are viewing your course on slower internet connections or mobile devices. Click here for instructions on “optimizing” and resizing your images for the web.

