Did you know that you can create a video presentation for your online class using only PowerPoint? Here’s how!
- Make Recordings Tab Available
- Record Your Presentation
- Edit Your Sound or Video
- Save Your Presentation as a Video
Make Recordings Tab Available
- Click on the File tab and then click Options in the left-hand menu.

- Click on Customize Ribbon and then click on the box next to Record and click OK. Make sure it’s checked!

Recording is now enabled!
Record your Presentation
-
Click on Record in the top menu.

- Choose Record from Current Slide or Record from Beginning to begin recording.

- Check the top middle section of the recording screen and be sure that the options that you prefer are enabled(Camera, Microphone, Auto-scroll).

- Click the red record button in the very center of the menu to Record.
- Click Pause when finished.
- Click Edit to go back to the PowerPoint slide.
You’ve now recorded a video of your PowerPoint!
Edit your Sound or Video
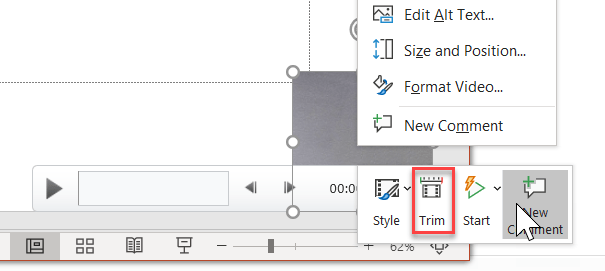
- Right click on the video that you created for your slide, and choose from the listed editing options.

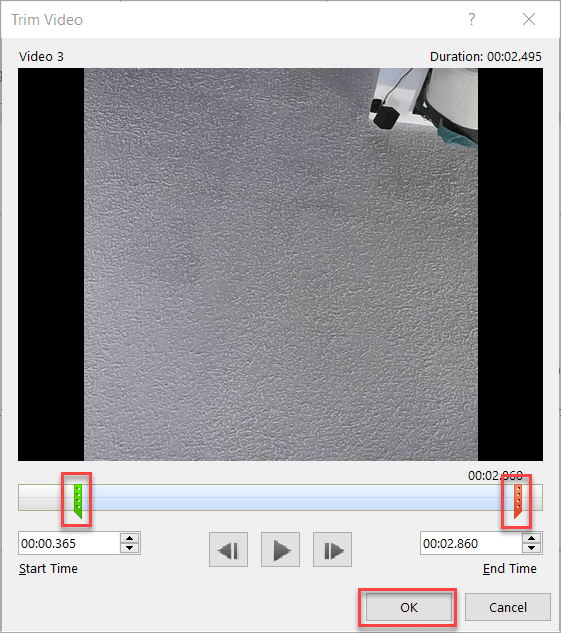
Style will allow you to add an interesting graphic effect, Trim will allow you to change the start and end times for the recording – perfect for cutting out any dead air before speaking! - Click on the start point and end point and drag them to the point desired, and then click Ok.

Save your Presentation as a Video
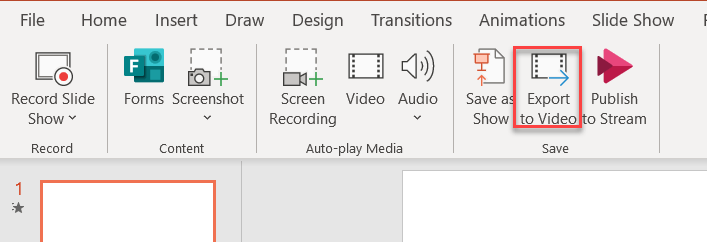
After you’ve recorded your presentation then you can Export it as a video.
- Click on Export to Video.

- Click Export Video to export as a .MP3. If you want to change the default or customize the resolution, click Customize Export.

Remember that the higher the quality of the video you choose the longer it will take to process and the larger it will be. Click Create Video when ready to export.

- Wait…a long time! It’s going to take a while to process the video. The larger the presentation the longer it will take to process. There will be a progress bar in the lower right-hand corner of the screen.
This article from Office.com shows you just how to do it: Record a slide show with narration and slide timings
Once you’ve created your video, you can upload it to Kaltura or YouTube.
NOTE: If you are using a Mac to create the video, it will be necessary to leave about 30 seconds of time at the beginning of the recording before you begin speaking. If not it will seem like it worked perfectly until you upload it to Kaltura, then the first portion of your audio will not be in the video.
