
This quick introduction will explain the recording options in Kaltura Capture and some of their common uses.
Kaltura Capture has three options you can mix and match to fit your needs: Camera, Screen, and Audio
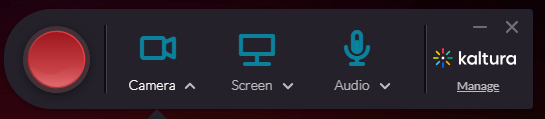
- Camera only recordings are great for brief ‘Getting to know you’ introduction posts or for lecture recordings.
- The Screen recording option is commonly used when a user has a PowerPoint presentation they need to post online. Using the screen recording tool they can open their PowerPoint and record themselves talking while they go through their presentation. Users can open their PowerPoint then choose whether Kaltura should record the whole screen or a part. If you choose only part you will be asked to select the area of the screen you would like to record.
- If a user is giving a speech that requires they not only use a visual aid but that they also video record themselves presenting, the Screen and Camera option will be most helpful.
- Audio only recordings are useful for blogging or for foreign language courses for pronunciation assignments.
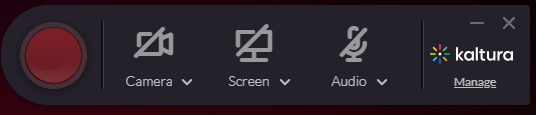
When you don’t want to use one of these recording options just click on the icon and it will be deselected.
VERY IMPORTANT: Using Kaltura Capture requires a machine with a minimum of 4 GB of RAM.
You will have the options Annotate, Pause or Resume the Recording, Finish, or Cancel any time during a recording. You can pull up the whole options bar by clicking on the Kaltura Capture icon in your Dock.
Annotation tools can be used while you record or during a pause. These tools are accessed by clicking on the pencil icon ![]() in the options bar.
in the options bar.
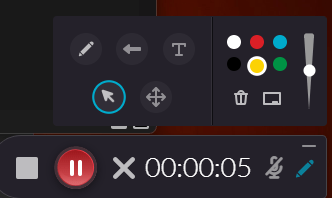
Feel free to play with these tools and see what is most useful for you- I particularly liked finding out it has a Whiteboard that I can interact with while I’m doing a recording!
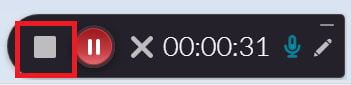
When the recording is done click the white box to stop recording.
You can then rename your video and click Save & Upload to upload your recording to your Kaltura Media in Blackboard. You can find your recording under Tools — Kaltura My Media or at video.uark.edu.
You do not have to use Kaltura to record your video but you do need to use Kaltura to upload your video! If you have a recording program that you are already comfortable with feel free to use it – then use this article to help you upload to Blackboard!
After you upload your media, you will submit your video to your assessment. There are multiple places where these videos can be submitted and these articles should help with each: