Kaltura MediaSpace Go (KMS Go) is a mobile app that allows you to upload recorded media from your mobile device into your Kaltura account directly! You can record a video using your device’s camera application and then access your camera gallery from KMS Go. Once uploaded, the media will be accessible from your Kaltura My Media space and can be embedded into Blackboard assessments.
Need help installing the app? Click here!
Recording with KMS Go
There are two ways you can record your video for uploading to your Kaltura My Media space:
 Recommended! Use the camera application to record the video (click here to jump to section)
 *Not Recommended Use KMS Go to launch the camera application to record the video (click here to jump to section)
*This method is not recommended for long recordings or recordings that cannot be redone
Once you have your video recorded and uploaded, you can submit your videos to your course assessments.
Alternate Methods to Upload from Mobile Devices (click here to jump to section)
Method 1: Using the Camera Application:
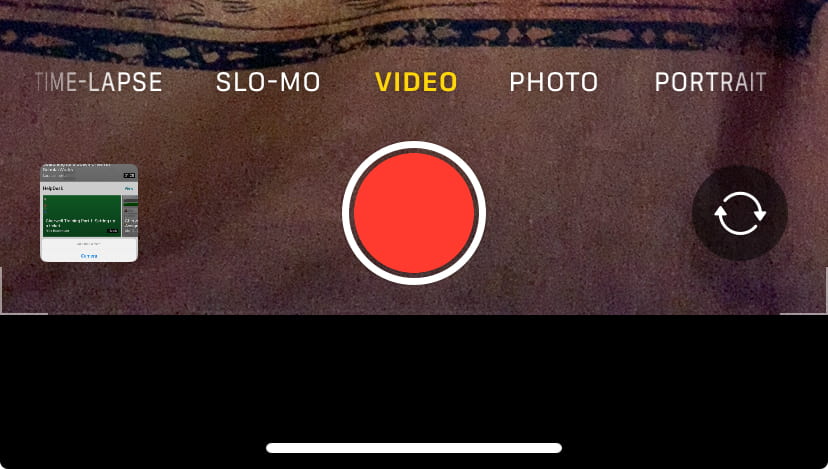
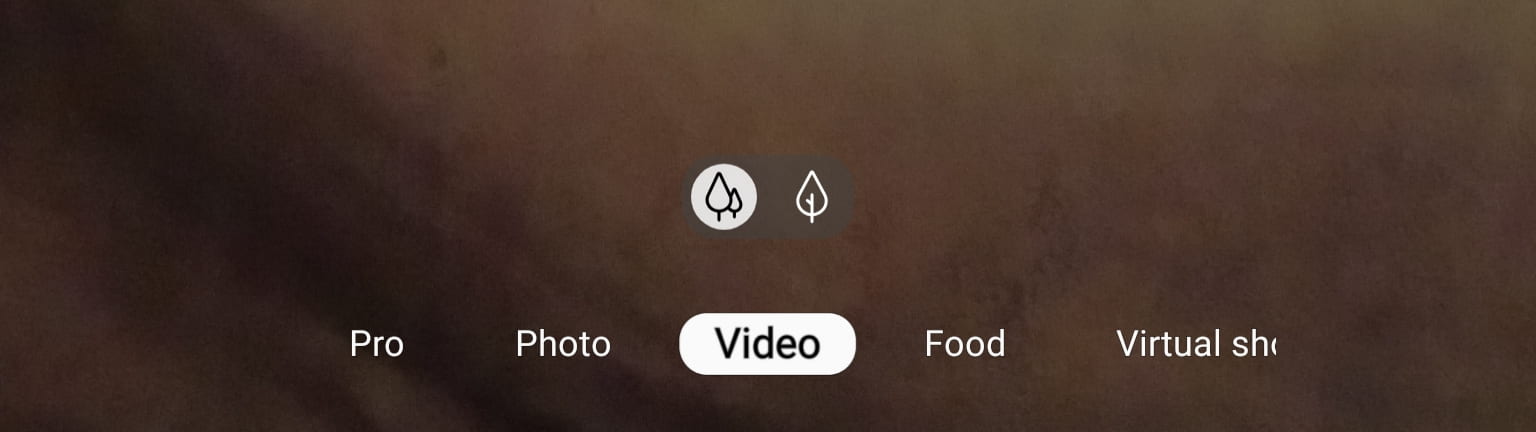
- Launch your device’s camera application and set it to “Video.” This will vary from device to device:
iOS:
 Note: You can record your screen instead by adding the Screen Recording to you Control Center. Read Apple’s instructional here.
Android:
- Press the red Record Button
 to begin recording your video.
 - Once recorded, open the KMS Go application and tap the Upload button (
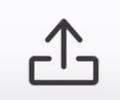 for iOS and
  for Android).
 - Next, tap Gallery.
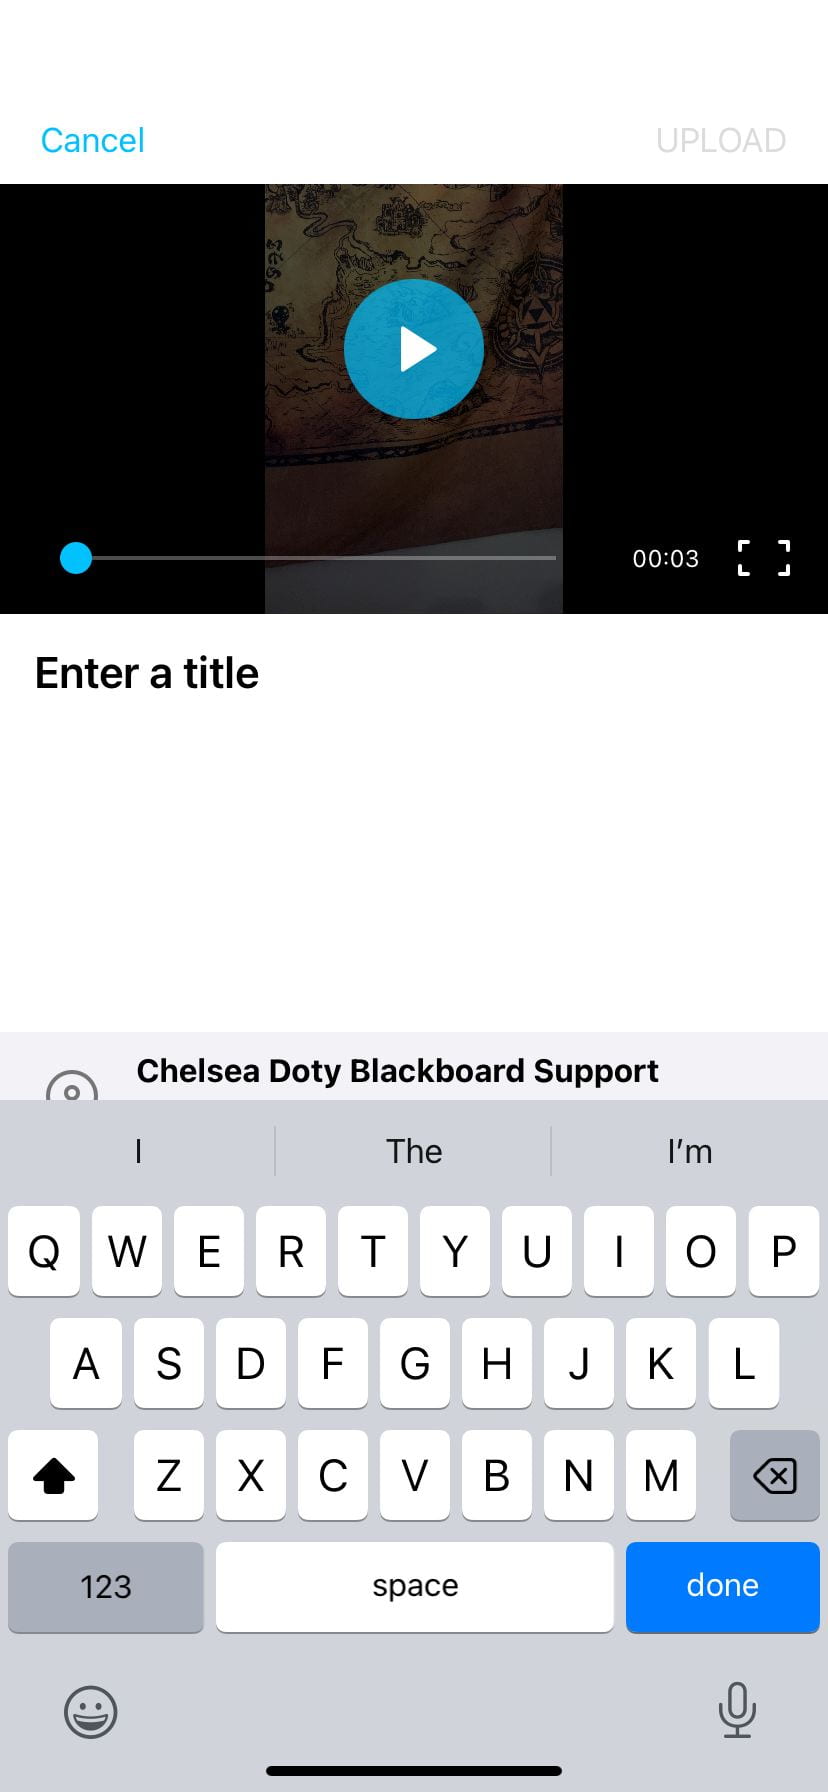
- Locate your video recording and tap it to add. Enter in a title for the video and tap Done to go to the next step.
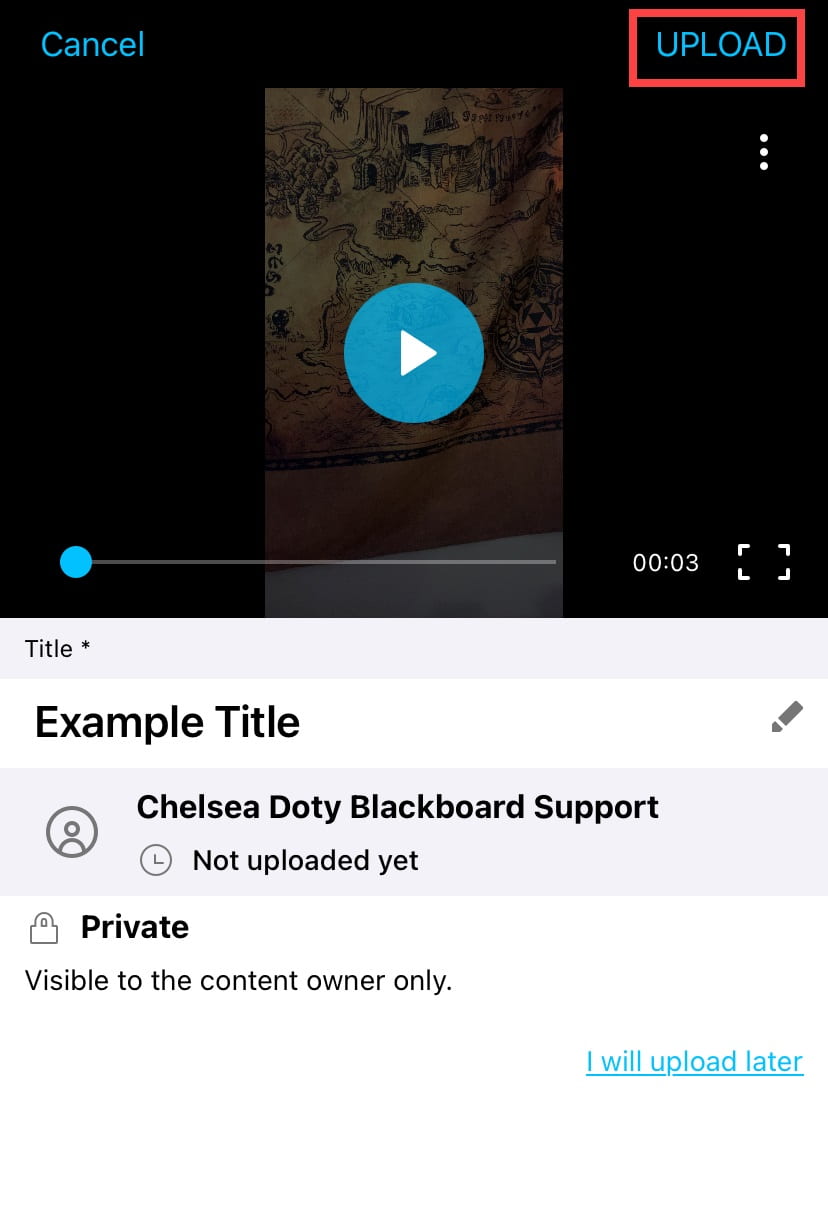
- Tap UPLOAD in the top right corner to begin the upload process.
IMPORTANT: Make sure your mobile device is connect to a stable internet connection for the entirety of the upload process! Any interruptions may cause the video to corrupt and not upload correctly.
- An “uploaded successfully” pop-up will appear when when the video has been successfully uploaded.
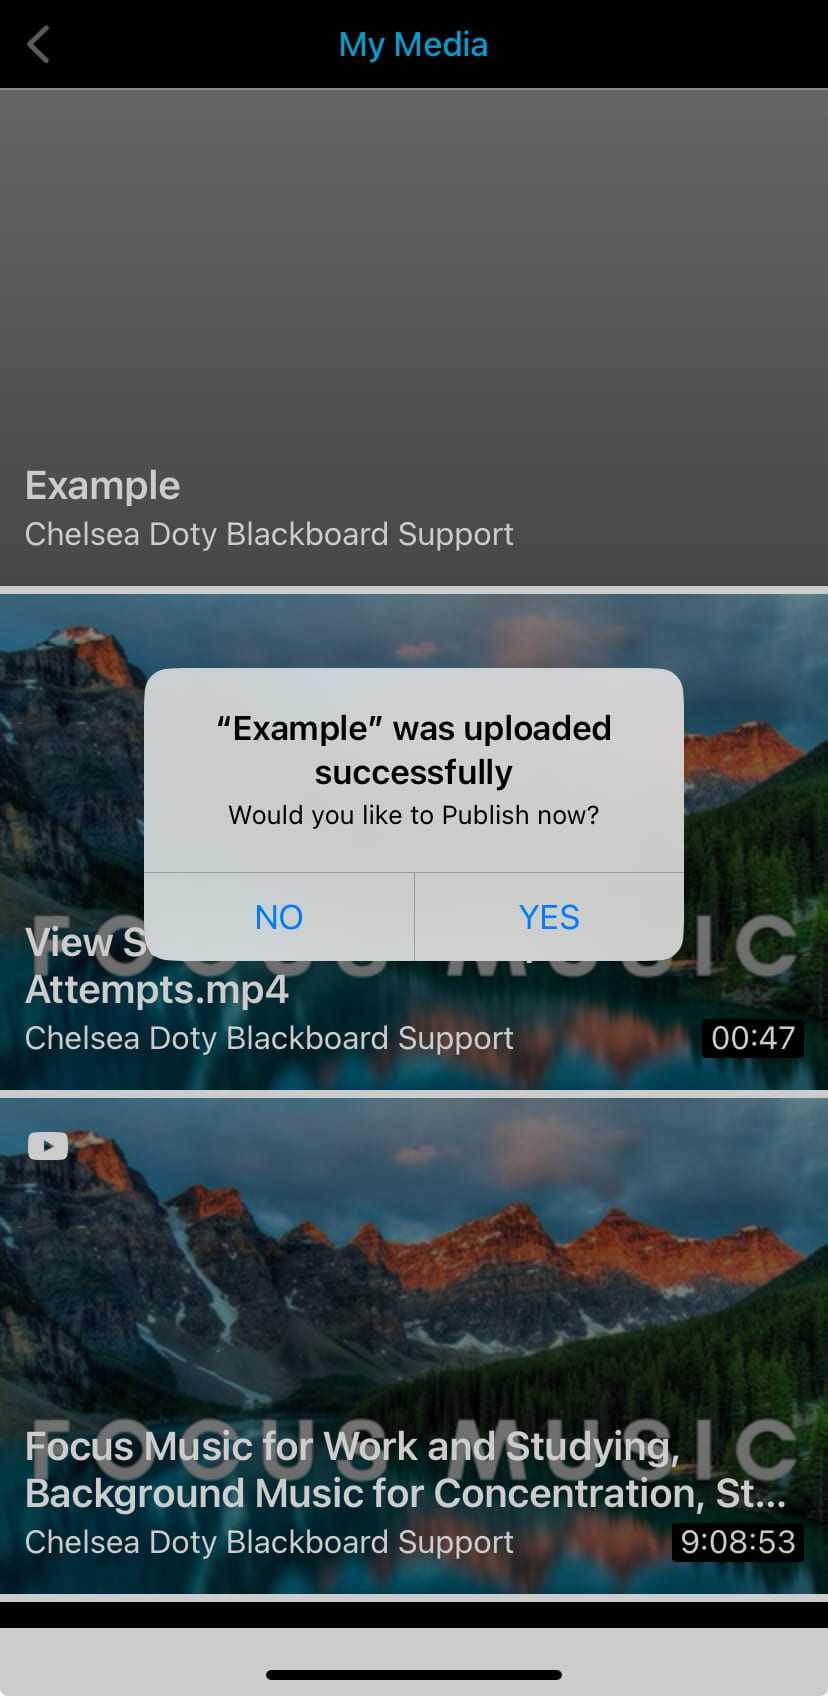
It may ask if you wish to Publish now: this isn’t necessary to use for your course submissions, but you are free to select either “Yes” to publish to allow *anyone* to search and view the video (not recommended), or “No” to keep it private (recommended).
Once you have your video recorded and uploaded, you can submit your videos to your course assessments.
Method 2: Using KMS Go to Launch the Camera:
This method isn’t recommended for long recordings or for sessions that cannot be redone. Make sure to only use this method for short videos or for sessions that can be re-recorded, and follow the instructions carefully and EXACTLY to avoid losing the video!
- Open the KMS Go application and tap the Upload button ( for iOS and for Android) and then tap Camera.
- This will launch your device’s camera application. To record, set the option to Video. This will vary from device to device, and may only have “Photo” and “Video” available:
iOS:
Android
- Press the red Record Button to begin recording your video.
- Once recorded, enter a title for your video and tap Done to enter the next step. DO NOT UPLOAD yet!
- Tap the I will upload later option found below the title you entered. This will ensure the video that was just recorded is saved to your camera roll.
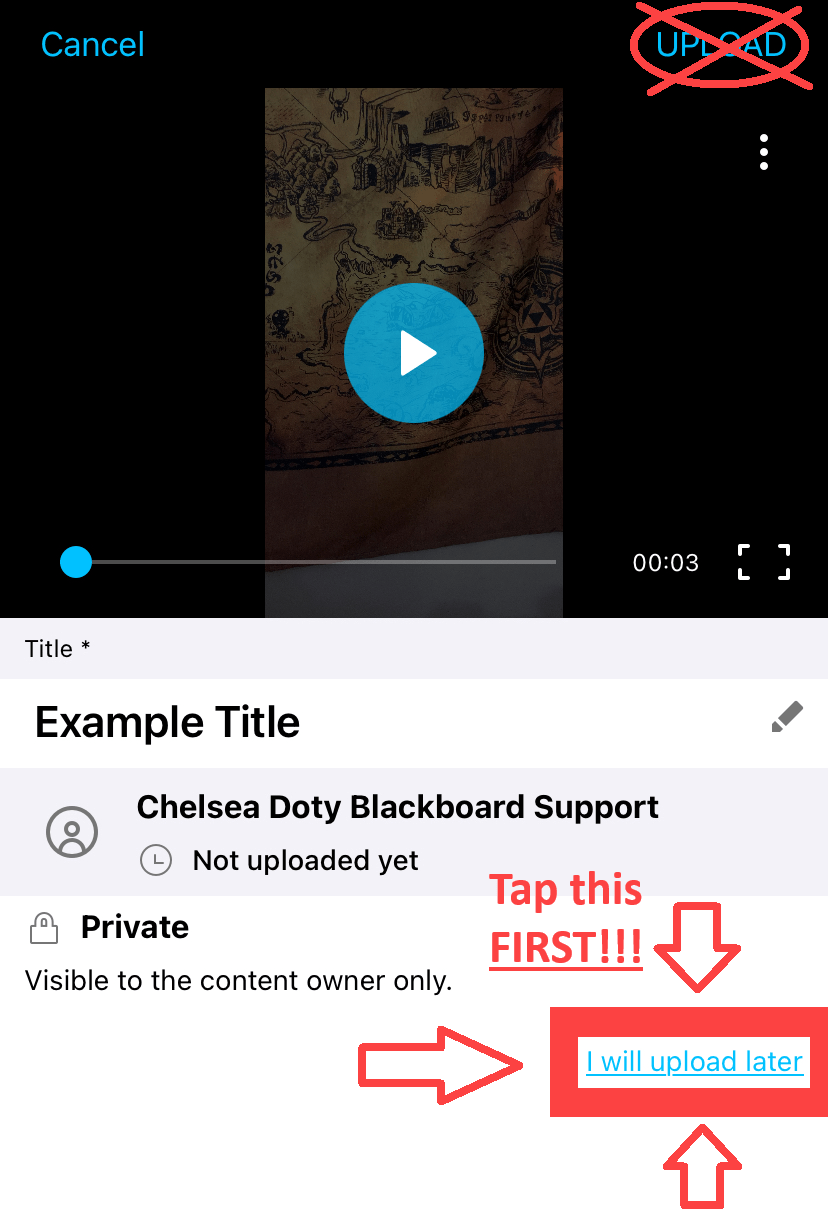
NOTE: If you do not tap I will upload later first and instead tap Upload, your video will instead begin the uploading process without saving to your device. If something goes wrong or your internet connection is interrupted in any way, your recording will be lost. - Once recorded, tap the Upload button ( for iOS and for Android) and then tap Gallery.
- Locate your video recording and tap it to add. Enter in a title for the video if prompted again and tap Done to enter the next step.
- Tap UPLOAD to begin the upload process.
IMPORTANT: Make sure your mobile device is connected to a stable connection for the entirety of the upload process. Any interruptions may cause the video to corrupt and not upload correctly.
If you followed the steps exactly up to this point and something does go wrong, your video will still be saved to your camera roll to try again. - An “uploaded successfully” pop-up should appear when complete.
It may ask if you wish to Publish now: this isn’t necessary to use for your course submissions, but you are free to select either “Yes” to publish and allow *anyone* to search and view the video (not recommended), or “No” to keep it private (recommended).
Once you have your video recorded and uploaded, you can submit your videos to your course assessments!
Additional Resources:
Blackboard Learn Original Course Embed Instructions
Blackboard Learn Ultra Course Embed Instructions
Alternate Methods to Upload from Mobile Devices
- Connect your mobile device to a computer to transfer the video to a storage drive and then upload through Kaltura My Media.
- Save your video to OneDrive (support for Android and support for iOS) to sync the file to your computer, and then upload through Kaltura My Media.
- Log into learn.uark.edu on your mobile browser and upload through Kaltura My Media (may not work for iOS).
- Download the Blackboard Learn application and upload through Kaltura My Media.